Wednesday, June 25, 2014

DIY Chevron Photo Frame

Hey guys! It's been a while. I'm going partially unplugged this summer and when I am on the computer, I'm gearing up for Christmas projects and products. Don't remind me that it's only June, I know and I'm no where near ready for winter, but I just sold on of my Santa Plates the other day, so people are starting to shop.

So on to the project.  My sister is doing her baby's bedroom in grey and red chevron and asked me to recreate a few things she found on Amazon for about 3 times the cost of what I could do them for. I love being able to do gifts for people and they don't have to spend an arm and a leg.  This is one of the projects she gave me...a chevron frame.
Paint your frame your base color. I'm doing white and it took 2 coats. I found this basic wood frame at Michaels. Make sure it is 100% dry. I'd let it dry overnight, because I did not and the final result is not spectacular.
Cut your chevron out of vinyl and apply to the entire frame. Don't weed anything yet. My frame is going to be dark grey, light grey, even lighter grey and white so I labeled my chevrons D,M,L,W for the different colors.
Then I weeded away all the ones that had a D on them for my darkest color.
Then weeded away all the M's for the next shade and painted that color
Finally all the L's for the lightest grey.
Then all the W's for the final reveal. It turned out great except for the fact that I didn't wait for the white to be dry enough and it gave it a bit of a rustic look. So I think I'll sand the whole thing a little bit and even it out. This one will be for me!
 
Other projects on the horizon: A chevron growth chart and chevron clock. I'm so excited!
 
These are soon to be available for purchase in my etsy shop.

Monday, May 12, 2014

Metal Etching


Who knew there were so many things you could do with your Silhouette?  When I first purchased this machine, I didn't have a clue.  Now, just about any project I do, I look to my Cameo for help.

This month's Silhouette Challenge is April Showers Bring MAY Flowers.  I thought pretty deeply about this one. I was going to do a paper flower wreath (which I did and is probably the blog under this one), but I'd seen it before. I was going to do paper flowers in paper terra cotta pots from the SIL store, but I'll be working on those for my son's birthday this month and didn't want to do them already.  So I decided to share my new passion with you all...metal etching!  It is seriously a ton of fun!
Things you'll need:
*Scrap of vinyl
*Metal blanks (copper, nickel silver or brass)
*Jump Rings
*Steel wool (.0000)
*Sharpie Marker
*PCB etchant solution
*Baking soda
*Rubber Gloves and Goggles

First you want to clean your blank with the steel wool. Blanks usually have an oily residue left behind from the cutting process and this will effect the etching.

Next you want to apply your vinyl. I'm showing you two different ways.  The etchant will eat away at the metal that is not covered by a resistant. I will be filling those stencil pieces with black sharpie. So far I have found Sharpie and vinyl to be great resistants. Stayz-on stamp ink works well too but this is a silhouette challenge :) 

You also want to use Sharpie on the edges of your blank. This is very important. If you skip this step the edges of your finished project with be rough and jagged because the etchant will eat away at it.

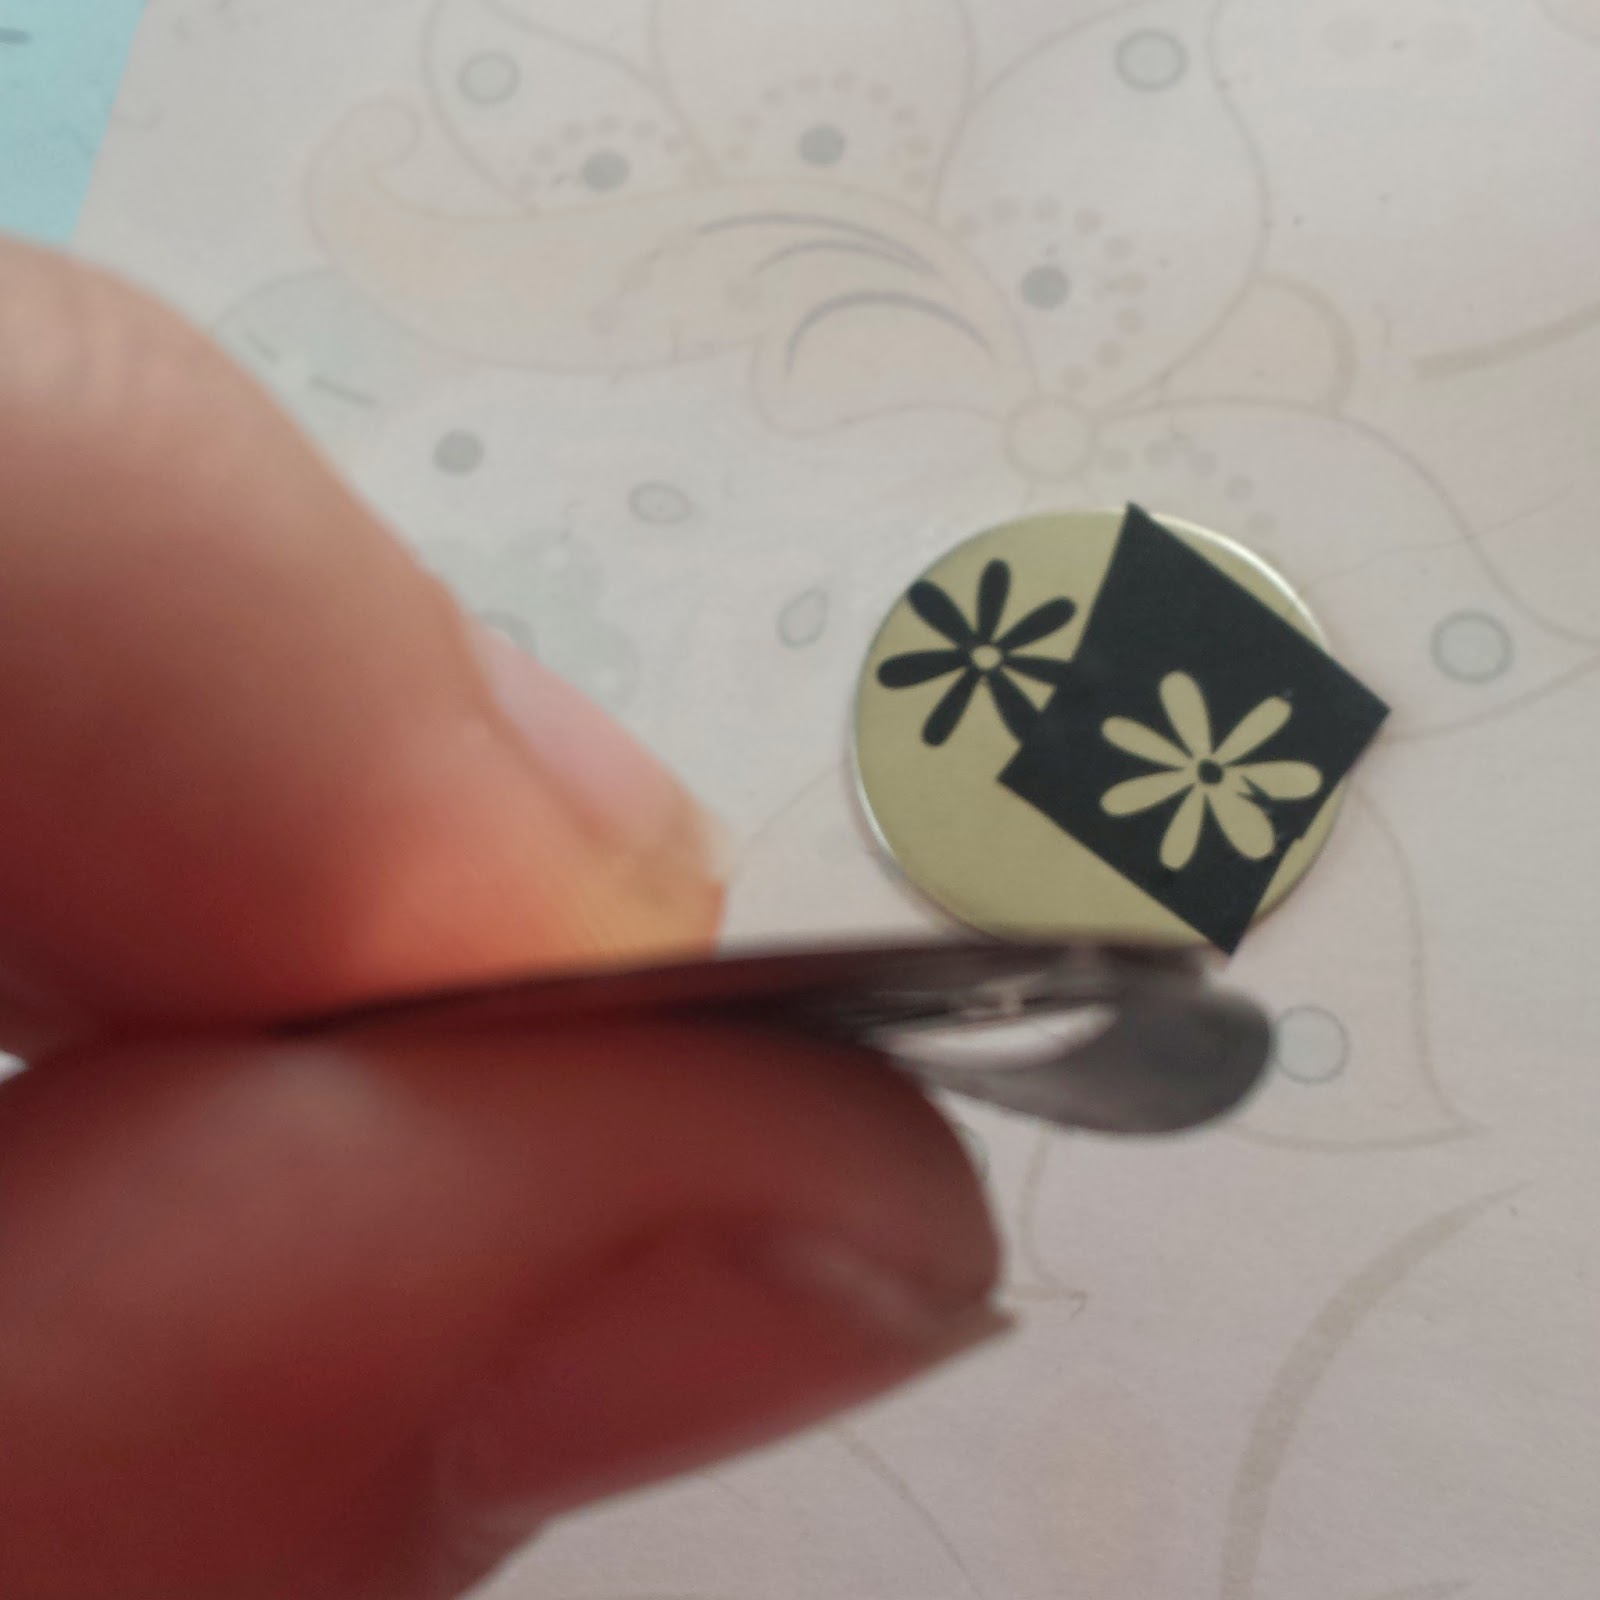
So again, anywhere where there is a resistant, the metal will not be etched. I like using Sharpie when I want a hand written look and vinyl for more detailed work.  You can see that vinyl gives you a much cleaner edge. I added little dots around the edge for some extra decoration.

Now for etching. I made myself this little foam boat, but most people just use packaging tape to suspend the blank in the solution. Do not let the blank rest on the bottom of your etching container.

Wrap packaging tape all around your boat and make sure the blank is firmly pressed onto the tape. You don't want it to etch the back side.  If you are just using tape, same thing, make sure they are firmly pressed onto the tape.

Put on your rubber gloves and goggles...safety first! Pour some etching solution into a plastic container.  And float your blanks on top of the solution. Again, do not let them touch the bottom of the container. Let it take a nice etchant bath for about 20 minutes. Wearing gloves, take your boat out of the solution and check the depth of the etch. Here is where I usually prefer sharpie because you can really feel where the etching is.  I take a tooth pick and drag it across the blank to check for depth. With vinyl it's a little harder to do, but still doable. If it isn't etched as deep as you'd like, put it in for another 10 minutes. The older your solution is, the longer it will take.  I've etched about 6 times with this batch of solution and it took this batch of blanks about an hour. If you forget all about it, you will come back to an empty boat. It will eat all the way through the metal.

When it's done etching, transfer it to another container with 1 part baking soda to 10 parts water. I usually use Tablespoons. Let that rest for a while. Go do something while you wait. I usually give it 10 minutes or so. Rinse in warm water.  
 
***Please dispose of solution properly. Do not pour down your drain, it will etch your pipes, plus it isn't good for our water.*** 

They look a little rough when they come out of their baths. Give them another swipe or two with the steel wool to shine them up and erase the sharpie. Remember the edges.

Use a metal hole punch to punch holes in the top.

Add a jump ring and proudly display your new creation on a key chain or chain.  I love these!  I think these will be some key chains for teacher gifts...or myself!
 
To purchase some of these beautiful pendants, please visit my other etsy shop.

Want to Check Out More Silhouette Projects?

My Silhouette Challenge buddies and I are all sharing projects on our blogs today, so peruse the projects below for a wealth of Silhouette inspiration!


Vellum Flowers


Silhouette Challenge - Shape Challenge - Flowers


Paper Wedding Roses


Tea Party Invites


Dr. Seuss Graduation Gift


Hand Made Floral Cards for Mom


Say it With Flowers - May Silhouette Challenge (Paper Craft)


Confetti Flower Card


Silhouette Challenge! May flowers mixed media art


Wearable Flower Power ~ Silhouette Challenge


Silhouette Sketch Pen Tutorial - Watercolor Flowers


Dingbat Font Flower Garden Flag


Stenciled Burlap Canvas


Distressed White Washed Terra Cotta Pot with Book Page Flowers


Creating Floral Fabric Teacups Using Your Silhouette Machine + Free Cut File!


DIY Paper Flowers: 3D Paper Tulips


DIY: Fabric Flower Hairpins


Silhouette Sketch Pens Peony Prints


Paper Purse Gift Card Holder


3d Watercolor Paper Peony Flowers


DIY Home Decor Paper Blossom Branches


Floral Note Card Set


French Box Upcycle with Graphic Challenge ‪#‎silhouettechallenge‬


DIY Summer Activity Mason Jar Decor with Upcycled Pallet Wood


Metal Etching


flower kraft boxes


Vellum Flower Arrangement


Thank-You Cards {Made on Silhouette}

1. Create & Babble // 2. Kate's Paper Creations // 3. Please Excuse My Craftermath // 4. Tried & True // 5. unOriginal Mom // 6. Mama Sonshine // 7. Adventures in All Things Food & Family // 8. The Experimental Home // 9. The Outlandish Momma // 10. Whats Next Ma // 11. Dream a Little Bigger // 12. Silhouette School // 13. Creative Ramblings // 14. Our Rosey Life // 15. Bringing Creativity 2 Life // 16. Practically Functional // 17. Minted Strawberry // 18. Two Purple Couches // 19. Simply Kelly Designs // 20. Grey Luster Girl // 21. TitiCrafty // 22. My Mom Made That // 23. Architecture of a Mom // 24. My Paper Craze // 25. The Sensory Emporium // 26. Ginger Snap Crafts // 27. Mabey She Made It // 28. McCall Manor //


Sunday, April 20, 2014

A Project From The Heart

Disclaimer: This post contains the sensitive topic of miscarriage and loss. It is not a topic I usually include on this blog, but I want to tell my story and explain the beauty behind this project.  I do not sensor much of the story in this post, though I have decided to only include pictures of the project and not pictures of my baby.  Thank you for reading.


We had just finished celebrating Christmas with loved ones. Our son opened plenty of presents, I enjoyed as much food as my pregnant belly could handle.  Little did we know that not all was well with the baby. A few days later, we went to a regular doctors appointment only to be told she couldn't find the heartbeat. An ultrasound confirmed that our baby had indeed passed.  I was 16 weeks along and decided to deliver our baby, hold him, and bury him in our home town. At 11 pm on December 31st, we were admitted to the labor and delivery floor at the hospital. At midnight, when everyone was celebrating, we were waiting. We watched the ball drop on tv from our hospital bed. We watched fireworks out our room's window. Being torn between the joy of a new year and the despair of such a loss. Thinking of all the newness the new year would bring and all the memories we would never create. At 11:11 the following morning we said hello and goodbye to a 1.1 ounce baby boy. We named him Gabriel Russell in honor of my great great grandpa Russell G.  This is truly one of the hardest things my husband and I have ever done. 

For the last three years, we have only decorated his grave site with wreaths, flowers and other lawn decorations with the intention of putting a permanent marker out there at some point. Nothing ever seemed good enough. A stone is so cold and lonely. A wreath is so bare. I decided I wanted a bench out there. A little bench. One fit for a little boy to sit on.  I dreamt up the design, my husband made it a reality.  I stained it, created stencils, and sealed it. An unfortunate reason to have to team up with my husband to create something, but this is the most beautiful thing we have ever created (except of course our two other children).

I wanted to write this blog to tell my story. To let others know that they are not alone. This subject can be so taboo and unspoken. Even though I knew I was not alone, the topic of Gabriel is always so awkward and I felt I couldn't talk about him openly. I've changed my outlook on that. Gabriel is my son and I talk about him as if I've spent the last three years with him, not a mere 3 hours. I also wanted to share the story behind the symbols on our bench and show off the beautiful work my husband did.

 Snowflake flourish (on both ends of the bench): Gabriel was our winter baby. Also, you know the glittery snow? The snow that catches the light in such a way that it looks like silver glitter is falling from the sky? I call that Gabriel snow. I always seem to see it when I've been thinking about him a lot. It's like he's saying hello, I'm still here and I love you.

We will see you again (on back of bench): We do believe we will see Gabriel again. Carrie Underwood's song hit me hard one day. Since then, I can't listen to the song without thinking of our baby. 

 A moment in our arms. A lifetime in our hearts (front of bench): I think this one's pretty self explanatory. We only held Gabriel for a few hours, but he will be forever a part of us.
Top of Bench

These images are on the legs of the bench. I'm not sure why I chose birds to represent Gabriel. But I always do. Sometimes I choose Christmas cards and other things we are sending as a family, that have birds on them so I can sign Gabriel's name without really signing his name. Now you know family :) The little boy and his dog represent Gabriel and my husband's dog. We've always said that the DreamWorks logo (boy fishing on the moon) reminds us of my grandpa and Gabriel.  I thought the DreamWorks logo would be kind of cheesy and thought this one was just perfect. And the boy on the tractor represents our family's love of tractors.
 
The story is not all sad. I have one beautiful little boy who is almost 5 (Brock) and a 2 year old girl (Emma Eve, named for my great great grandma Evelyn G. Wife of Russell). Emma was due January 2nd, 2012 (Gabriel 1.1.11, Emma 1.2.12) which was a sign to me that everything was going to be okay. Of course Emma was fashionably late and came on January 8th. I see a lot of signs in things. Signs that things are okay. Signs from Gabriel and God that they're there for us. Emma being born on January 8th was no different. Because the year before, January 8th, 2011, was the day we buried our sweet Gabriel.
 

"Every little thing is going to be alright"


Monday, April 14, 2014

Sketching Just Got Easier!

So there are a lot of bumps and glitches in the new program update, but one thing I love is, sketching just got so much easier!  Before V3, you had to select what you wanted to sketch and unselect what you didn't want to sketch and if you're doing a lot of colors or a lot of copies of one thing, that gets pretty tedious. I even did a video on how to break up the colors so all you had to do was switch colors and tabs in Silhouette Studio. It's pretty much a breeze now.  So while Silhouette America works through the glitches in other areas, I will rejoice in the fact that I can sketch a whole lot easier!

I'm going to work through this tutorial with the assumption that you have no idea how to use the new version of studio. I might not even be doing it right, but it's what works for me and it really allows me to zip through my projects quickly.

You are going to start with sizing your paper. I'm using a letter size sheet of cardstock, so I set my page up like so.

Next, I will be making my card 6x4, so I resize a rectangle to reflect that. I work with just the front of the card first.  I'll make the rest of the card later.

I found these cute files in the SIL store. Crazy, but I have never sketched something I purchased in the store. I was very excited to try it out!

Then I designed by card front. I changed the line colors to the color I planned to use. So here you see I have the circle pink and the bunny brown.

Then I duplicate my rectangle, overlap them a bit and draw a line down the center.


Weld the rectangles together and then change the center line color to a different color. I do this because I'll be perforating the green line. Now I will say this is one thing that I didn't like. I want to be able to set my cut lines for this at the same time. I want the red and green lines to cut at the same time, but for the green to perforate and I couldn't figure out a way to do that at this time. Oh well, the process was already way quicker!
Now it's time to sketch! Here you see all my different line colors as layers.  So first I'm going to sketch the black lines, so I check the black box.

Change to sketch pen option. Use a Silhouette Sketch Pen or use your pen holder to draw it out.

Click send to silhouette and ta-da just the black sketched. I'm so excited to not have to select and unselect all the different pieces!
Then just work through your different layers. Uncheck the colors you don't want to sketch and select the ones you do. Trust me, this is so much easier than it was before!


In minutes, I had two super cute cards for Easter! I was even motivated to make a couple more because it was so easy and fast!
 
I hope this was helpful as you start to learn V3 when it comes to sketching.  I'll try to do a video soon.
 
Now let me show you something I've just started selling that you might need to add to your supplies wish list.  A pen roll up! My pens are constantly all over the place. This keeps them all in one place and has a pocket for me to store my extra blades and pen holders.  Much more organized!  Right now I'm doing them as custom orders. Contact me on etsy so I can use fabrics that fit your personality!
 
 
It's a Spring theme for my blogger friends and me! Check out all these great Spring Projects to get you in the mood for Spring (not that that will be hard to do).


Spring Cleaning - Custom Canisters

I Love Paris In the Springtime

Etching for Sping - Mug Personalization for the April Silhouette Challenge

WHEELY excited about spring

No-Sew Fabric & Burlap Peter Cottontail Banner

Narwhals, plus friends

Gold Fern Easter Eggs

Mr and Mrs Easter Egg Head

Easter Bunny Plate

Welcome Spring - A Sign From Tile

Paper Flowers Wall Art

DIY: Bunny-Stamped Goodie Bags for Easter

Inspirational Window

Now We Have Everything Nursery Art

Spring' and Flowers Paper Banner

Glitter Jars with a Happy, Hoppy Bunny Made with the Silhouette + Free Cut File!

Mother's Day Wreath

Decorate A Watering Can With Vinyl!

April Showers Sketch Pen Printable

Spring Wreath

Burlap Garden Flag with Heat Transfer Vinyl

Pretty Little Herb Pots

Peter Cottontail Door Hanger

Spring Has Sprung

Spring Has Sprung - Subway Art

Bloom And Grow Sunflower Bouquet for Teacher Appreciation

Sharpie Easter Eggs

Tear Open Easter Egg Cards

Look what's Blooming! ~ Silhouette Challenge

Everblooming Paper Bouquet

Silhouette Challenge: Spring Polish Swap Card

[B] is for Bloom: Scrap Lumber Flower Vases

Tulip Time - Fridge Magnets

Neon Paper Pinwheels {tutorial}

A Happy Spring Card

Sketching Just Got Easier!

Spring Bunny Baskets

Bird Nerd Easter Eggs

Easter Peeps Treats with {FREE} Printables and Cut File

Garden Bench Update


1. Dream a Little Bigger // 2. So Much Better With Age // 3. Adventures in All Things Food // 4. Creative Carnival // 5. The Kim Six Fix // 6. feto soap // 7. One Dog Woof // 8. The Experimental Home // 9. From Wine to Whine // 10. Architecture of a Mom // 11. Grey Luster Girl // 12. Minted Strawberry // 13. Designed Decor // 14. Tried & True // 15. Silhouette School // 16. Bringing Creativity 2 Life // 17. Weekend Craft // 18. Practically Functional // 19. Please Excuse My Craftermath... // 20. McCall Manor // 21. unOriginal Mom // 22. Creative Ramblings // 23. A Tossed Salad Life // 24. A Glimpse Into Barb's Life // 25. Kate's Paper Creations // 26. Simply Kelly Designs // 27. Cutesy Crafts // 28. Persia Lou // 29. Whats Next Ma // 30. Two Purple Couches // 31. The Frill of Life // 32. Nearly Handmade // 33. Get Silvered // 34. Ginger Snap Crafts // 35. Life After Laundry // 36. The Sensory Emporium // 37. Monograms & Cake // 38. The Thinking Closet // 39. My Paper Craze // 40. Chicken Scratch NY

Thursday, March 27, 2014

Origami Owl together with Initials Inc.

I rarely blog about my Origami Owl business. I just don't find many opportunities and I keep this mostly a crafting blog. However, this is a special cause. 

A friend of mine through a crafting group is raising money for a local family that just lost their nine year old daughter. They are unprepared for the expenses and could use our help.  I've teamed together with her to raise money. 

Dee at Cupcakes and Crowbars is raising money by selling super cute cases! I want to buy them all!

Visit her blog (link will take you directly to the fundraiser) for more information and how to order. And to keep it crafty, I can totally see those with some HTV or embroidery. Stock up for Christmas gifts!

I am teaming up with Dee with an Origami Owl Online Jewelry Bar. I will be donating a large portion of my commission on all items and 100% of my commission on awareness ribbon charms.
Now you might be thinking, I don't know these people. Why donate? I don't either. But my company's mission is to be a force for good.  And I enjoy finding causes to uphold this mission.  So if you can find it in your heart to place an order, you can be a force for good as well. 

If you have any questions, you can email me at bwarrn@hotmail.com or comment here.

Thank you and God bless!

Monday, March 10, 2014

Paper Garland


Woohoo! Another month, another Silhouette Challenge and I'm so excited. This month's theme is paper and paper just happens to be one of my favorite mediums.  So before accepting this challenge, I had to think really hard about one thing I haven't done with paper.  There isn't much, however, one thing that has always scared me is sewing paper.  Did you know you could sew paper?  I just recently (within the last year) learned I could do this and now that I've taken the leap, I can only imagine the fun things I can do with this new skill. 

So, what did I want to sew?  Well I need centerpieces for my best friend's baby shower and a little banner would be so cute!  So, I made a pennant banner that is tiny enough to fit on top of cute little terrariums.

Cute right? Perfect for a Woodland Theme Baby Shower.
So here's how you do it.
I started with all these little pieces.  I used a triangle shape and sized it to about 1.5 inch.

Then I changed the stitch spacing on my machine to about 3 and chained them together.  All you do is feed them through the machine. As soon as one triangle is about done, put the other one in and feed it through.  Here is a side view.
 

And a head on view.  Just keep feeding them through and before you know it, you have a nice little banner.

 
I just love it!  I'm envisioning doing this in seasonal colors. I can keep the terrarium the same and just change the banner!

These are going to look awesome at the baby shower!
 
Do you love paper crafting as much as I do?  Do you run out of ideas like I did?  Well, check out some of my friends to get some more inspiration.


Want to Check Out More Silhouette Projects?

My Silhouette Challenge buddies and I are all sharing projects on our blogs today, so peruse the projects below for a wealth of Silhouette inspiration!


The Great Lamp Rescue

Barnyard Animal Paper Garland & Party Details

Sweet and Simple Easter Bunny Card

Owl Theme Baby Shower

Ombre Paint Chip Earrings & Free Cut File

Spring is Blooming

Drop It (Like It's Hot) Hexagon Tray

Spruce Up Your RECIPE BOOK

Gift Card Giving Free Cut Files

Custom outlines for stamps

Mickey Mouse Clubhouse Juice Boxes

Wine Themed Bridal Shower

Learn How To Make A Sewn Paper Garland!

Moroccan Thank You Card

3D Flower Spring Wreath

For the Love of Paper: Cutting Embellishments

Create Your Own St. Patrick's Day Cupcake Wrappers and Toppers

Swimming Word Art

St. Patrick's Day Lime White Chocolate Chips Cupcakes + Freebie

You're invited to a dog party!

I'm so Lucky!

Spring Wreath with SIlhouette Cut Flowers

Tiny Princesses Paper Dolls

Colorful Quote with your Silhouette

Get Well Bouquet with Persimmon Roses

Greeting Card Holder

Baby Shower Invitations

How-To Create a Custom Pillowbox on Your Silhouette Machine + Free Cut File!

Quality Time Jar

Matchbox Cover with {FREE CUT FILE}

DIY Baby Girl Shower Invitation

Candy Alphabet Travel Game

Paper Garland

Pretty Paper Roses

DIY Geometric Heart Journal

Hand Made Decorations for a Pirate Party

Wedding Shower Gift Heart Map

Decoupaged Letters (A scanner + A Silhouette = Spectacular results!)

Easter Pop-up Box Card with Sweet Sorbet Designer Paper from Stampin' Up!

Better World Greeting Cards

Star Wars Silhouette Canvas

Monogrammed Gifts

Make Printable Gift Wrap with your Silhouette Software

Free Printable: Blank Banner with free Silhouette Cut File


1. McCall Manor // 2. The Turquoise Home // 3. Creative Savings // 4. Sandpaper and Glue // 5. The Thinking Closet // 6. Sowdering About in Seattle // 7. Persia Lou // 8. From Wine to Whine // 9. Dream a Little Bigger // 10. Please Excuse My Craftermath... // 11. Play. Party. Pin. // 12. Everyday Paper // 13. Practically Functional // 14. A Tossed Salad Life // 15. My Favorite Finds // 16. The House on Hillbrook // 17. Adventures in All Things Food // 18. A Glimpse Into Barb's Life // 19. TitiCrafty // 20. The Experimental Home // 21. feto soap blog // 22. Creative Ramblings // 23. The Stamp Doc // 24. Ginger Snap Crafts // 25. Simply Kelly Designs // 26. Whats Next Ma // 27. unOriginal Mom // 28. Bringing Creativity 2 Life // 29. Cutesy Crafts // 30. My Paper Craze // 31. Create & Babble // 32. Grey Luster Girl // 33. The Sensory Emporium // 34. Lil' Mrs. Tori // 35. Black and White Obsession // 36. Mama Sonshine // 37. Weekend Craft // 38. Creative Carnival // 39. Peace, Love and Joyce // 40. Tried & True // 41. The Frill of Life // 42. Dragonfly & Lily Pads // 43. Get Silvered // 44. Minted Strawberry