Monday, April 14, 2014

Sketching Just Got Easier!

So there are a lot of bumps and glitches in the new program update, but one thing I love is, sketching just got so much easier!  Before V3, you had to select what you wanted to sketch and unselect what you didn't want to sketch and if you're doing a lot of colors or a lot of copies of one thing, that gets pretty tedious. I even did a video on how to break up the colors so all you had to do was switch colors and tabs in Silhouette Studio. It's pretty much a breeze now.  So while Silhouette America works through the glitches in other areas, I will rejoice in the fact that I can sketch a whole lot easier!

I'm going to work through this tutorial with the assumption that you have no idea how to use the new version of studio. I might not even be doing it right, but it's what works for me and it really allows me to zip through my projects quickly.

You are going to start with sizing your paper. I'm using a letter size sheet of cardstock, so I set my page up like so.

Next, I will be making my card 6x4, so I resize a rectangle to reflect that. I work with just the front of the card first.  I'll make the rest of the card later.

I found these cute files in the SIL store. Crazy, but I have never sketched something I purchased in the store. I was very excited to try it out!

Then I designed by card front. I changed the line colors to the color I planned to use. So here you see I have the circle pink and the bunny brown.

Then I duplicate my rectangle, overlap them a bit and draw a line down the center.


Weld the rectangles together and then change the center line color to a different color. I do this because I'll be perforating the green line. Now I will say this is one thing that I didn't like. I want to be able to set my cut lines for this at the same time. I want the red and green lines to cut at the same time, but for the green to perforate and I couldn't figure out a way to do that at this time. Oh well, the process was already way quicker!
Now it's time to sketch! Here you see all my different line colors as layers.  So first I'm going to sketch the black lines, so I check the black box.

Change to sketch pen option. Use a Silhouette Sketch Pen or use your pen holder to draw it out.

Click send to silhouette and ta-da just the black sketched. I'm so excited to not have to select and unselect all the different pieces!
Then just work through your different layers. Uncheck the colors you don't want to sketch and select the ones you do. Trust me, this is so much easier than it was before!


In minutes, I had two super cute cards for Easter! I was even motivated to make a couple more because it was so easy and fast!
 
I hope this was helpful as you start to learn V3 when it comes to sketching.  I'll try to do a video soon.
 
Now let me show you something I've just started selling that you might need to add to your supplies wish list.  A pen roll up! My pens are constantly all over the place. This keeps them all in one place and has a pocket for me to store my extra blades and pen holders.  Much more organized!  Right now I'm doing them as custom orders. Contact me on etsy so I can use fabrics that fit your personality!
 
 
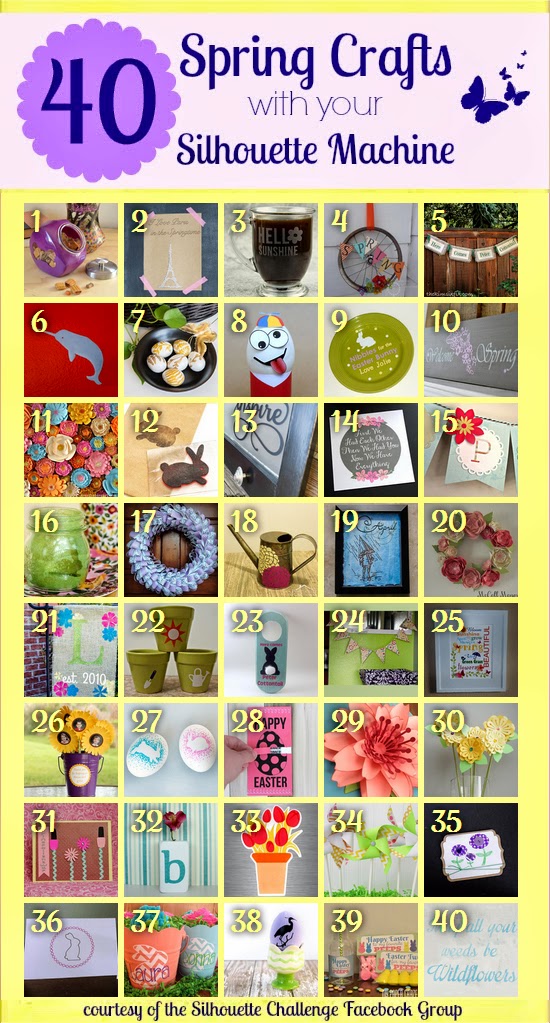
It's a Spring theme for my blogger friends and me! Check out all these great Spring Projects to get you in the mood for Spring (not that that will be hard to do).


Spring Cleaning - Custom Canisters

I Love Paris In the Springtime

Etching for Sping - Mug Personalization for the April Silhouette Challenge

WHEELY excited about spring

No-Sew Fabric & Burlap Peter Cottontail Banner

Narwhals, plus friends

Gold Fern Easter Eggs

Mr and Mrs Easter Egg Head

Easter Bunny Plate

Welcome Spring - A Sign From Tile

Paper Flowers Wall Art

DIY: Bunny-Stamped Goodie Bags for Easter

Inspirational Window

Now We Have Everything Nursery Art

Spring' and Flowers Paper Banner

Glitter Jars with a Happy, Hoppy Bunny Made with the Silhouette + Free Cut File!

Mother's Day Wreath

Decorate A Watering Can With Vinyl!

April Showers Sketch Pen Printable

Spring Wreath

Burlap Garden Flag with Heat Transfer Vinyl

Pretty Little Herb Pots

Peter Cottontail Door Hanger

Spring Has Sprung

Spring Has Sprung - Subway Art

Bloom And Grow Sunflower Bouquet for Teacher Appreciation

Sharpie Easter Eggs

Tear Open Easter Egg Cards

Look what's Blooming! ~ Silhouette Challenge

Everblooming Paper Bouquet

Silhouette Challenge: Spring Polish Swap Card

[B] is for Bloom: Scrap Lumber Flower Vases

Tulip Time - Fridge Magnets

Neon Paper Pinwheels {tutorial}

A Happy Spring Card

Sketching Just Got Easier!

Spring Bunny Baskets

Bird Nerd Easter Eggs

Easter Peeps Treats with {FREE} Printables and Cut File

Garden Bench Update


1. Dream a Little Bigger // 2. So Much Better With Age // 3. Adventures in All Things Food // 4. Creative Carnival // 5. The Kim Six Fix // 6. feto soap // 7. One Dog Woof // 8. The Experimental Home // 9. From Wine to Whine // 10. Architecture of a Mom // 11. Grey Luster Girl // 12. Minted Strawberry // 13. Designed Decor // 14. Tried & True // 15. Silhouette School // 16. Bringing Creativity 2 Life // 17. Weekend Craft // 18. Practically Functional // 19. Please Excuse My Craftermath... // 20. McCall Manor // 21. unOriginal Mom // 22. Creative Ramblings // 23. A Tossed Salad Life // 24. A Glimpse Into Barb's Life // 25. Kate's Paper Creations // 26. Simply Kelly Designs // 27. Cutesy Crafts // 28. Persia Lou // 29. Whats Next Ma // 30. Two Purple Couches // 31. The Frill of Life // 32. Nearly Handmade // 33. Get Silvered // 34. Ginger Snap Crafts // 35. Life After Laundry // 36. The Sensory Emporium // 37. Monograms & Cake // 38. The Thinking Closet // 39. My Paper Craze // 40. Chicken Scratch NY

Thursday, March 27, 2014

Origami Owl together with Initials Inc.

I rarely blog about my Origami Owl business. I just don't find many opportunities and I keep this mostly a crafting blog. However, this is a special cause. 

A friend of mine through a crafting group is raising money for a local family that just lost their nine year old daughter. They are unprepared for the expenses and could use our help.  I've teamed together with her to raise money. 

Dee at Cupcakes and Crowbars is raising money by selling super cute cases! I want to buy them all!

Visit her blog (link will take you directly to the fundraiser) for more information and how to order. And to keep it crafty, I can totally see those with some HTV or embroidery. Stock up for Christmas gifts!

I am teaming up with Dee with an Origami Owl Online Jewelry Bar. I will be donating a large portion of my commission on all items and 100% of my commission on awareness ribbon charms.
Now you might be thinking, I don't know these people. Why donate? I don't either. But my company's mission is to be a force for good.  And I enjoy finding causes to uphold this mission.  So if you can find it in your heart to place an order, you can be a force for good as well. 

If you have any questions, you can email me at bwarrn@hotmail.com or comment here.

Thank you and God bless!

Monday, March 10, 2014

Paper Garland


Woohoo! Another month, another Silhouette Challenge and I'm so excited. This month's theme is paper and paper just happens to be one of my favorite mediums.  So before accepting this challenge, I had to think really hard about one thing I haven't done with paper.  There isn't much, however, one thing that has always scared me is sewing paper.  Did you know you could sew paper?  I just recently (within the last year) learned I could do this and now that I've taken the leap, I can only imagine the fun things I can do with this new skill. 

So, what did I want to sew?  Well I need centerpieces for my best friend's baby shower and a little banner would be so cute!  So, I made a pennant banner that is tiny enough to fit on top of cute little terrariums.

Cute right? Perfect for a Woodland Theme Baby Shower.
So here's how you do it.
I started with all these little pieces.  I used a triangle shape and sized it to about 1.5 inch.

Then I changed the stitch spacing on my machine to about 3 and chained them together.  All you do is feed them through the machine. As soon as one triangle is about done, put the other one in and feed it through.  Here is a side view.
 

And a head on view.  Just keep feeding them through and before you know it, you have a nice little banner.

 
I just love it!  I'm envisioning doing this in seasonal colors. I can keep the terrarium the same and just change the banner!

These are going to look awesome at the baby shower!
 
Do you love paper crafting as much as I do?  Do you run out of ideas like I did?  Well, check out some of my friends to get some more inspiration.


Want to Check Out More Silhouette Projects?

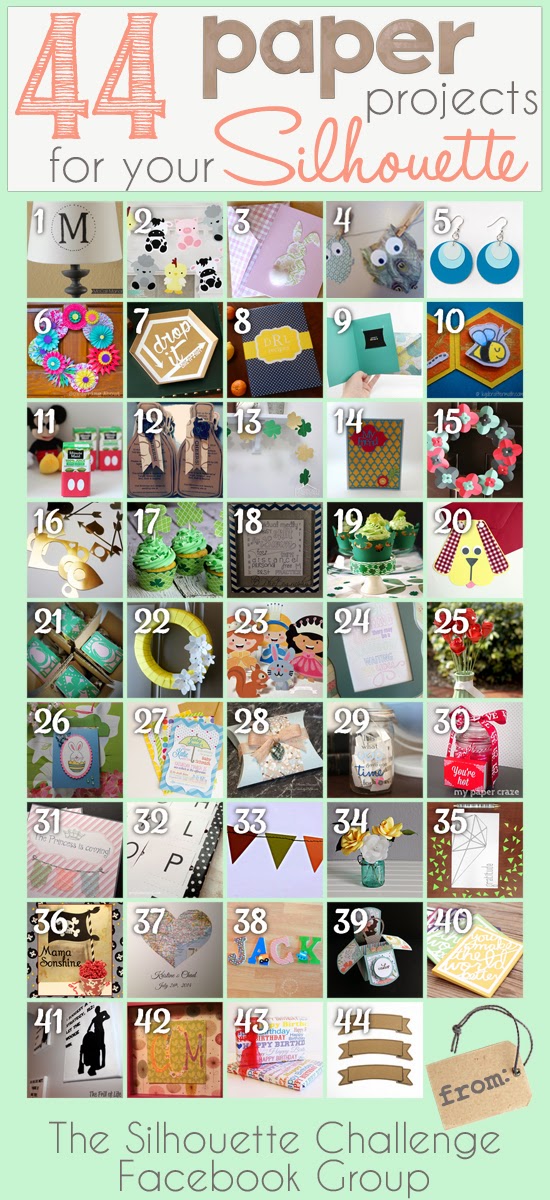
My Silhouette Challenge buddies and I are all sharing projects on our blogs today, so peruse the projects below for a wealth of Silhouette inspiration!


The Great Lamp Rescue

Barnyard Animal Paper Garland & Party Details

Sweet and Simple Easter Bunny Card

Owl Theme Baby Shower

Ombre Paint Chip Earrings & Free Cut File

Spring is Blooming

Drop It (Like It's Hot) Hexagon Tray

Spruce Up Your RECIPE BOOK

Gift Card Giving Free Cut Files

Custom outlines for stamps

Mickey Mouse Clubhouse Juice Boxes

Wine Themed Bridal Shower

Learn How To Make A Sewn Paper Garland!

Moroccan Thank You Card

3D Flower Spring Wreath

For the Love of Paper: Cutting Embellishments

Create Your Own St. Patrick's Day Cupcake Wrappers and Toppers

Swimming Word Art

St. Patrick's Day Lime White Chocolate Chips Cupcakes + Freebie

You're invited to a dog party!

I'm so Lucky!

Spring Wreath with SIlhouette Cut Flowers

Tiny Princesses Paper Dolls

Colorful Quote with your Silhouette

Get Well Bouquet with Persimmon Roses

Greeting Card Holder

Baby Shower Invitations

How-To Create a Custom Pillowbox on Your Silhouette Machine + Free Cut File!

Quality Time Jar

Matchbox Cover with {FREE CUT FILE}

DIY Baby Girl Shower Invitation

Candy Alphabet Travel Game

Paper Garland

Pretty Paper Roses

DIY Geometric Heart Journal

Hand Made Decorations for a Pirate Party

Wedding Shower Gift Heart Map

Decoupaged Letters (A scanner + A Silhouette = Spectacular results!)

Easter Pop-up Box Card with Sweet Sorbet Designer Paper from Stampin' Up!

Better World Greeting Cards

Star Wars Silhouette Canvas

Monogrammed Gifts

Make Printable Gift Wrap with your Silhouette Software

Free Printable: Blank Banner with free Silhouette Cut File


1. McCall Manor // 2. The Turquoise Home // 3. Creative Savings // 4. Sandpaper and Glue // 5. The Thinking Closet // 6. Sowdering About in Seattle // 7. Persia Lou // 8. From Wine to Whine // 9. Dream a Little Bigger // 10. Please Excuse My Craftermath... // 11. Play. Party. Pin. // 12. Everyday Paper // 13. Practically Functional // 14. A Tossed Salad Life // 15. My Favorite Finds // 16. The House on Hillbrook // 17. Adventures in All Things Food // 18. A Glimpse Into Barb's Life // 19. TitiCrafty // 20. The Experimental Home // 21. feto soap blog // 22. Creative Ramblings // 23. The Stamp Doc // 24. Ginger Snap Crafts // 25. Simply Kelly Designs // 26. Whats Next Ma // 27. unOriginal Mom // 28. Bringing Creativity 2 Life // 29. Cutesy Crafts // 30. My Paper Craze // 31. Create & Babble // 32. Grey Luster Girl // 33. The Sensory Emporium // 34. Lil' Mrs. Tori // 35. Black and White Obsession // 36. Mama Sonshine // 37. Weekend Craft // 38. Creative Carnival // 39. Peace, Love and Joyce // 40. Tried & True // 41. The Frill of Life // 42. Dragonfly & Lily Pads // 43. Get Silvered // 44. Minted Strawberry

Monday, March 3, 2014

Woodland Baby Shower

I've blogged about my kids' birthday parties, but this is the first time I've done a baby shower.  If you read my post last night, you know my best friend is having a baby and I'm so excited!  So I threw a baby shower for her. It turned out so beautiful.
It starts with the invitation.  I created all of this using the animals from the SIL store. However, the creator of the animals has a similar invitation in the SIL store.

The gift "table". You'll see more on this cute banner next Monday.

Woodland Animals Banner.  It's a boy! If you don't know already, I'm excited!  The animals are from the SIL store, font is KG Be Still and Know and I traced the banner shape from Google.

Cute little centerpieces. Fish bowls, moss and sticks from Dollar Tree and I got the bird house from Joann.

Yummy Snacks!  Chocolate covered pretzels and there was another jar with some covered in nuts as well. They're supposed to look like bird treats. They were really good!
Another delicious snack, acorns!  Hershey kisses, mini Nilla wafers and peanut butter chips all held together with frosting. Yum!
And what is a party without cupcakes? Don't you just LOVE this cupcake stand? My mom made it for me.  Cupcake stand is topped with a wooden R (for the baby's name) wrapped in green jute. Animal cupcake wrappers are from the SIL store and then I also created some of my own using the acorn from the gift bags.
Party favor bags from the SIL store.


Badges for the Mommy, Grandma and Aunts. These are made using Shrinky Dinks.  Started with a 3 inch circle in Studio and created my design.  Drew the badges using my pen holder and Sharpie Ultra Fine markers. Cut them out by hand or with a punch, punch a hole in the top and shrink. Add a safety pin and you have an awesome badge for the special people at the shower.
My favorite part was the guest book.  We did finger prints on a tree (from the sil store). Tree was drawn using Gelly Roll Gel Pens.
 
Games we played: Name the Baby Animal, Baby Shower Bingo and Guess the Belly Size.
 
It was a fantastic shower, filled with lots of love and support.  Now May can get here.  I'm ready to snuggle this baby!

Sunday, March 2, 2014

The Hardest Sewing Project Ever!

My best friend is having a baby in May. I'm so excited. From the day she got married, I knew I was going to do this project. Seems kind of crazy, but I was super excited.  Little did I know, when the time came, it would be so hard!  It was hard emotionally and for my talent level.  Read on...

So, I'm making a blanket.  Here is the fabric selection:
 Cut into 6.5inch squares. Easy. I've done this before. 
Here comes the hard part...See this? This is my brides maid dress when I was the matron of honor at her wedding.

See, here we are.  Her all pretty and glowing on her wedding day. Me all swollen and 5 months pregnant.  But it was a beautiful day, rained when it could and didn't when it shouldn't.

And here is that little princess in my belly, trying the dress on for size.  A little big :)


I had to hand wash it and hang it to dry because her niece spilled wine down the front and it left a huge stain. But I got it out.

 Yes, those are scissors on the dress, why do you ask. (Hand shaking, unsure I should really do it!)
 No going back now!
 Really no going back...
 Yup! Those are little 6.5 inch squares of my bridesmaid dress. 
 But you know what? It's okay, because this is turning out to be a beautiful quilt.
 
 
I'm so glad I did this. It turned out beautiful and made her cry (which is always the goal ha ha).  She's my best friend and this is the best baby gift I could ever give.  No gift I ever give again will mean as much to me.

Monday, February 10, 2014

Machine Applique with Silhouettee Cameo

I'll start off this post with a confession: This was not as easy as I thought it was going to be.  It took a lot of trial and error, but that will just make it easier for next time.  This month, in sticking with the original silhouette challenge, I wanted to do something I had never done before.  I LOVE when my cameo meets my other favorite hobby...sewing!  I just got a really awesome new embroidery machine and I'm loving every second with it.  So anyway, I'm blabbing and carrying on...let's get on to the tutorial.

In light of Valentine's Day, I found this really cute double heart applique design at GG Designs (This will take you right to the heart, but there are a lot of awesome designs there). I wanted to see if it would be easier if I cut out the pieces first rather than having to trim them in the hoop.

First I had to delete all the fancy embroidery lines in my embroidery software so I could get it as basic as possible. Make sure you undo this, otherwise you'll lose those lines.
And this is what I got when I took a screen shot. This doesn't lend itself to be traced very nicely. So, I traced it using the "Draw a curve shape" tool as highlighted below.
See it highlighted there in the yellow?  So I just traced it point by point. You also need to make sure you resize it to be about the same size as the embroidery file. Ask me how I know.
 
I missed getting a picture of the next couple steps...oops!  I put freezer paper on the back of my fabric to stabilize it.  Make sure it is really tacked down, you don't want it to drag or slip when the blade touches it. I also don't remember what settings I used, but they wouldn't be the same as yours because my blade is really dull and needs replaced!
Then I placed my hearts, once cut out, where I thought they would look best on the towel.  Getting pretty excited about this. However, I cut them too small the first time, so I had to recut.  And I still didn't get them quite big enough, but it worked out okay.
 
Then you just run your embroidery machine the same way you would if you were doing applique the other way.
 
Like I said, it isn't perfect, but it was fun and it turned out pretty cute.  I like how it looks hanging out on my stove.

For more inspiration for using your cameo to do projects with fabric, check out my fellow bloggers projects:

  1. No-Sew Valentine's Day Pillows by A Tossed Salad Life
  2. No-Sew Interchangeable Fabric Bunting by unOriginal Mom
  3. Monogrammed Burlap Garden Flag by The Turquoise Home
  4. Crawl, Walk, Bike by It's Always Craft Time
  5. Freezer Paper Stenciled Tote Bags by Weekend Craft
  6. DIY Bleach Spray Shirt by Practically Functional
  7. Stenciling Sherlock by Please Excuse My Craftermath...
  8. Felt Star Wands by Cutesy Crafts
  9. Yoda Kid's T-Shirt by Architecture of a Mom
  10. Mark Your Territory- Dog Flags by Black and White Obsession
  11. Nautical Pillows by Lil' Mrs. Tori
  12. Big Sister Gift & Silhouette Cut File by Creative Ramblings
  13. Nerdy Baby Onesies + Free Cut File by Essentially Eclectic
  14. Easy Easter Bunny Onesie - Silhouette Cameo Craft by Adventures in All Things Food & Family
  15. Fabric Envelopes for LEARNING LETTERS! (& cut file) by From Wine to Whine
  16. "Good Morning, Sunshine!" Memo Board by Tried & True
  17. Hearts-A-Lot Burlap Pillow Cover by My Paper Craze
  18. Baby Quilt by Dragonfly & Lily Pads
  19. Surprise Holiday Banner by Whats Next Ma
  20. "Team Betty" Tote Bag by The Thinking Closet
  21. DIY Sock Minion by Create it. Go!
  22. Pretty Up Some Organza Bags by Getsilvered
  23. Easy Heart Appliqued Onsies by Create & Babble
  24. Bleach Pen Gel & Freezer Paper Stencils Made with the Silhouette Machine by Bringing Creativity 2 Life
  25. Valentines Baby Onesie & Boy's Shirt + Free Cut Files by The Frill of Life
  26. Valentine's OWL Always Love You T-shirt by My Favorite Finds
  27. DIY Screen Printed Curtains by Chicken Scratch NY
  28. Fabric Painted Quilted Wall Hanging by Terri Johnson Creates
  29. Glitter Iron-On Top by Simply Kelly Designs
  30. DIY Monogrammed T-shirts with Silhouette Heat Transfer Material by Pitter and Glink
  31. Birthday Challenge by Fadville
  32. Machine Applique with SIlhouette Cameo by The Sensory Emporium
  33. Fabric Applique Valentine's Day T-Shirt by DailyDwelling
  34. "Cute as Cupid" shirt by crafts, cakes, and cats
  35. Sew Cute Applique by Life After Laundry
  36. Rhino Onesie by It Happens in a Blink
  37. Upcycled Birchbox Cameo Accesory Organizer by Cupcakes&Crowbars
  38. Customizing textiles with Heat Transfer Vinyl (working title) by feto soap
  39. Easy Fabric Art by McCall Manor
  40. Lady Bug Tote Bag with Silhouette Rhinestones by Ginger Snap Crafts
  41. Mommy and Em's Coordinated Aprons by TitiCrafty
  42. Canvas sketch project and a share by Clever Someday
  43. Foxy Lady Pajamas by Mabey She Made It
  44. Teddy Bear by Work in Progress


Monday, January 13, 2014

Menu Planner


I didn't get my link in in time to be part of the January blog challenge, however I still wanted to make something and share all the other fantastic blogs.  This month's theme was Organization. January is a good time to get your house in order; in fact, it was probably one of your New Years Resolutions.  I've been working on organizing our menu planning for a while now and this project has been in the back of my mind for just as long.

What you'll need:
*Cookie Sheet (mine is from Dollar Tree)
*Vinyl Days of the week
*Pockets (I made mine)
*Cards with all your meals
 
Mind didn't turn out exactly how I wanted it.  A little bit of poor planning plus planning before I had the cookie sheet.  Oops! But it is functional for now.  Eventually the food cards will get a makeover and the pockets probably will too.  But never the less, here it is:
 
I used magnets made with aquarium rocks and scrapbook paper, but you could also glue cloths pins to the board.  I also used magnet strips on the back to hang on my fridge.

Check out some other project inspiration and organization ideas from the rest of the silhouette bloggers!


  1. DIY Window Shutter Mail Organizer by Weekend Craft
  2. Kids' Art Wall by Tried & True
  3. Organizing Silhouette and Craft Supplies by The Happier Homemaker
  4. Simple Recipe Organization by It's Always Craft Time
  5. Put a Label on it! Herb Names for Plant Stakes by Get Silvered
  6. Super Simple Linen Closet Labels by Two Purple Couches
  7. Beware of the Animals Vinyl Toy Box by A Tossed Salad Life
  8. Child desk accessories by Architecture of a Mom
  9. Organizing & the Important of Labels by The Turquoise Home
  10. Index Card Organizer for Easier Meal Planning by Chicken Scratch NY
  11. Create Craft Room Labels by Dragonfly & Lilypads
  12. Simple Storage Solution for your Christmas Ornaments by Vintage News Junkie
  13. Organize this: DIY Planner Covers, Tags & Dividers (made with Cereal Boxes) by Black and White Obsession
  14. How to Make a Cut File into a Print & Cut by Create & Babble
  15. Simple Chest Freezer Organizational Board by Nearly Handmade
  16. Vinyl Your Kitchen Canisters! by From Wine to Whine
  17. Nursery Closet Dividers & Silhouette Cut File by Creative Ramblings
  18. Make Custom Box Templates with a Silhouette for Drawer Organization by One Dog Woof
  19. Organizing the Craft Room by What's Next Ma
  20. Vinyl Wall Calendar by Crafts Cakes and Cats
  21. Personalized Toy Storage Bins by Lil' Mrs. Tori
  22. Personalized Routine Chart by Work in Progress
  23. Blog Planner Sheet Dividers + Free Cut Files by TitiCrafty by Camila
  24. Simple Project Calendar by Little Blue's Room
  25. Dry Erase Photo Frame Menu Board + Free Cut File by Essentially Eclectic
  26. Receipt Organization with Free Cut File by The Thinking Closet
  27. Cute and Easy Labels by Life After Laundry
  28. "What's For Dinner?" Menu Planning Board by unOriginal Mom
  29. Mixing Organization and Function: An Easy Conversion Chart by My Paper Craze
  30. Why do my cookies taste so bad? A lesson in baking. by The Life and Times of a TAP
  31. Custom Drawer Dividers by Please Excuse My Craftermath...
  32. The evolution of my labeling system by feto soap
  33. Ikea Drawer labels by McCall Manor
  34. Glass Etched Vinegar  & Oil bottles by Terri Johnson Creates
  35. Organize It: Bathroom Closet by The House on Hillbrook
  36. Ombre Butterfly Magnet Board by Sowdering About